10 Jul 2018
I’ve built a Raspberry Pi based GameBoy based on Kite’s SuperAIO. Where the original GameBoy had a GameLink socket I have a USB socket. I thought it would be a nice retro touch if i could plug a cable into 2 GameBoys in the same place and have working GameLink emulation (2 player tetris, pokemon trading, etc).
Data transfer cables like this one (i tried the USB 2 version of it) used to be popular for migrating data from an old Windows computer to a new one. These days they come with their own synchronisation software. But really they are just 2 usb network adapters connected together. On a linux box (like my GameBoy) both ends will get a new usb0 interface which you can configure any way you like.
In my previous post I talked about how i’d configured systemd to start some python code when the cable was plugged in. This does UDP multicast discovery (sort of like this) and writes the Gambatte core options file for both sides. And as it was a host-to-host link I just use link local addressing. But there was a hitch, obviously.
My first assumption was that the cable would have two proper MAC address. Like 2 real hardware network cards connected together. On testing with a raspberry pi it looked like both ends had the same mac address. That was weird and felt broken but I didn’t think too much of it until I realised my link local addresses were the same on both systems. And it looked like duplicate address detection wasn’t happening (presumably it assumes unique mac addresses?).
The first thing I tried was in systemd (its my hammer, everything is now a nail). In /etc/systemd/system/00-gamelink.link:
[Match]
Driver=plusb

[Link]
MACAddressPolicy=random
And various permutations of. But none of them did anything. Sigh.
At first i wasn’t sure I had the right [Match] stanza. I did.
Then I wasn’t sure about the name of the .link file. The sort order of .link files is important. Each device is tested against all criteria in the [Match] section and its the first .link file to match the criteria that is used. So if the sort order in use meant that 99-default.link came before gamelink.link then it would never be used. It wasn’t that.
Eventually I ended up in the systemd source code. From here:
case MACPOLICY_RANDOM:
        if (!mac_is_random(device)) {
                r = get_mac(device, true, &generated_mac);
                if (r == -ENOENT) {
                        log_warning_errno(r, "Could not generate random MAC address for %s: %m", old_name);
                        break;
                } else if (r < 0)
                        return r;
                mac = &generated_mac;
        }
        break;
So if the MAC address is already random the policy won’t do anything. The only think other than systemd that might set the mac address in my setup is the kernel itself. From here I found:
static int __init usbnet_init(void)
{
	/* Compiler should optimize this out. */
	BUILD_BUG_ON(
		FIELD_SIZEOF(struct sk_buff, cb) < sizeof(struct skb_data));

	eth_random_addr(node_id);
	return 0;
}
A driver’s init is called when the driver is loaded, not when a device is loaded. Surely it can’t be this though - it seems unlikely that a module loaded at boot time would be loaded so deterministically that the mac would be the same on 2 separate systems, even if they were using the same image.
cat output/build/linux-*/.config
<snip>
CONFIG_USB_USBNET=y
Ah, it’s compiled in.
Forcing usbnet to be a module hides the issue. I’m not sure what this is actually doing. If usbnet is compiled in:
- Does usbnet_init get called before the PRNG is initialized at all?
- Does usbnet_init get called before there is any entropy?
- Is the entropy for the PRNG actually unreliable/missing this early (e.g. there is no RTC and no physical ethernet)
Either way, as a module there is enough of a delay for eth_random_addr to return some slightly random data for us, so link local addressing works, so my python code works. Hurrah.
Also given the driver allocates a single random mac address at boot (or module load time) does this mean you can’t plug multiple usbnet cables into the same linux box?
02 Mar 2018
I just got my hands on my Gemini yesterday. I have been looking forward to this campaign delivering for over a year (I was so excited I managed to be backer #5). It’s a spiritual successor to the Psion devices I grew up with and that makes it a must have for me - even if my ultraportable Mac and iPhone have seemingly eroded any real need. So here are my first thoughts on the Pocket Computers Gemini.
The elephant in the room?
A lot of the campaign backers seemed surprised and confused by the form factor. It uses mobile phone hardware and so technically can make phone calls (if you get the 4G edition). But it’s true parentage is the palmtop. It’s a clamshell, a teeny tiny ARM laptop. But people have been horrified you can’t see caller ID without opening it and that there isn’t a 32MP super camera slapped on the front.
Personally even if the Gemini was perfect and the software was complete it probably wouldn’t ever be my ‘daily driver’ mobile phone. But it might mean I stopped carrying my laptop around to meetings.
Packaging
It was very well packaged. Almost Apple level. The hinge mechanism on the box has a magnetic lock so its easy to open but also closes securely. The only thing that went wrong was Hermes - as you might expect - played football with it damaging one corner. Luckily the hardware itself survived.


The screen itself has a screen protector. It was so well applied I didn’t notice it at first. With it on the touch screen worked well but had a weird texture to it. Eventually i noticed a hole in it and removed it - this was surprisingly hard work. I can’t decide whether the screen protector was supposed to stay on and mine was defective or whether they need to work on making it easier to remove.
Hardware
I tend to have realistic expectations with crowdfunding campaigns. This is a small team and whilst they have an ok budget they have a tight deadline and very very demanding backers. There is so much that the team has had to pull together to get here. In this context the hardware has blown me away. It is far better than I ever expected.

My Gemini feels solid and doesn’t have that ‘cheap android’ feel to it that i’e come to expect from most phone manufacturers. It’s got a satisfying weight to it and is well made.
The keyboard might not be to everyones taste but my initial feedback is well done Planet Computers. I’ve been typing on it for less than an hour and i’ve already got a decent typing speed on it. I wrote this blog post on it and other than occasionally wondering where a symbol was hiding I did not find myself pining for a full size keyboard at all.
The screen is lovely. The size is weird, and on top of that there is the odd alignment that I thought might be upsetting. But really I barely notice, I’m fine with it.
The LEDs on the outside are cute and I hope they stay in the next revision but so far I don’t have a practical use for them.
Charging only works on the left hand side. I used it with a USB-A Anker charger and it charged just fine. Apparently the USB-C chargers might be problematic but I can’t confirm this (thanks mediatek).
I used a USB A-C adaptor and tried using a mouse. It worked just fine.
I’ve not had it long enough to get a feel for battery life yet.
Software
The stock software is Android. I’m struggling so far to rationalise whether things that frustrate me are just Android (i’m an Apple fanboy) or genuine rough edges that need fixes. I haven’t tried any other OS yet.
The Gemini boot graphics are gorgeous. I’m almost sad that I won’t see them very often.

The initial setup was buggy. The biggest issue was just that Android really didn’t like being landscape.
I had thought that Material UI was a way to make web apps feel like crappy phone applications (thats certainly what I use it for), but it turns out it makes native phone apps feel like crappy web apps too (that one is on Google).
I’m used to a single home button (and now 0 buttons on the iPhone X) so the ever present trio of buttons on the right hand side is annoying. I hope they can go away and be replaced by physical buttons / gemini app bar buttons.
The Gemini launcher is a great compromise at delivering the physical launcher that we had on Psion devices.
I haven’t figured out how to de-google things yet. Hopefully I can remove the google search window and chrome itself.

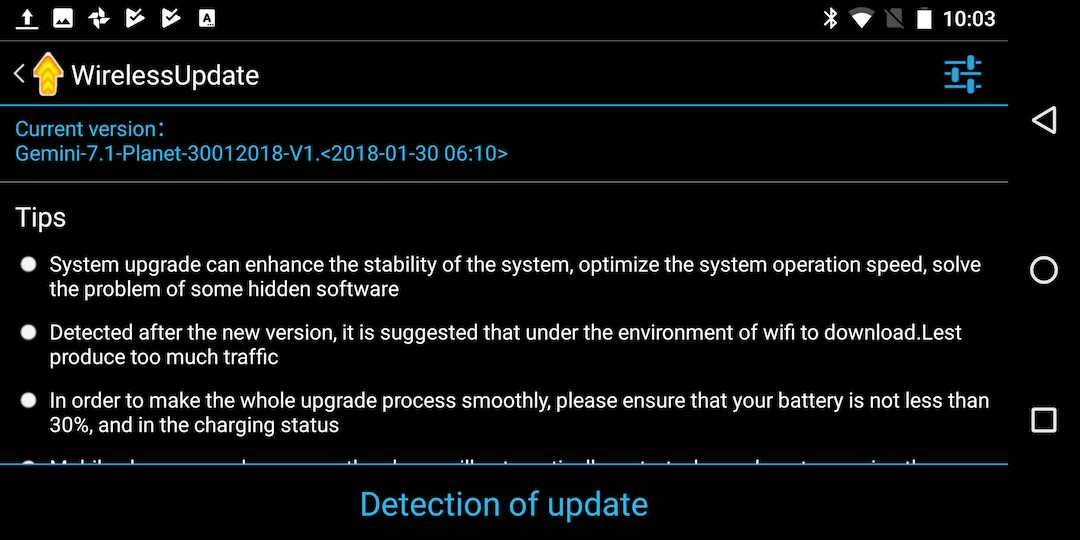
Some of the Gemini specific components like the updater are clearly still work in progress, but so far they do not fit in well with the rest of the device.
TL;DR
Love it, despite the rough edges.
The hardware is pretty fantastic really. There are definitely things i’d ask for in v2 (bigger screen, less bezel!) but what is there is great.
The software is clearly still being built. I wouldn’t tell non-techies to get one. But it has definitely found a place in my ‘everyday carry’.
I’d love to see a device like this running GNOME and working with GNOME Builder.
15 Aug 2017
One of the most annoying things with Docker has been how it interacts with iptables. And ufw. And firewalld. Most firewall solutions on Linux assume they are the source of truth. But increasingly thats not a sensible assumption. This inevitably leads to collisions - restarting the firewall or Docker will end up clobbering something. Whilst it was possible to get it working, it was a pain. And always a bit dirty. I don’t want to have to restart Docker after tweaking my firewall! Recently a new solution has presented itself and it looks like things are going to get a lot better:
In Docker 17.06 and higher, you can add rules to a new table called DOCKER-USER, and these rules will be loaded before any rules Docker creates automatically. This can be useful if you need to pre-populate iptables rules that need to be in place before Docker runs.
You can read more about it in the pull request that added it.
So how do we make use of that? Searching for an answer is still hard - there are 3 years of people scrambling to work around the issue and not many posts like this one yet. But by the end of this post you will have an iptables based firewall that doesn’t clobber Docker when you apply it. Docker won’t clobber it either. And it will make it easier to write rules that apply to non-container ports and container ports alike.
Starting from an Ubuntu 16.04 VM that has Docker installed but has never had an explicit firewall setup before. If you’ve had any other sort of Docker firewall before, undo those changes. Docker should be allowed to do its own iptables rules. Don’t change the FORWARD chain to ACCEPT from DROP. There is no need any more. On a clean environment before any of our changes this is what iptables-save looks like:
$ sudo iptables-save
# Generated by iptables-save v1.6.0 on Tue Aug 15 04:02:08 2017
*nat
:PREROUTING ACCEPT [1:64]
:INPUT ACCEPT [1:64]
:OUTPUT ACCEPT [8:488]
:POSTROUTING ACCEPT [10:616]
:DOCKER - [0:0]
-A PREROUTING -m addrtype --dst-type LOCAL -j DOCKER
-A OUTPUT ! -d 127.0.0.0/8 -m addrtype --dst-type LOCAL -j DOCKER
-A POSTROUTING -s 172.17.0.0/16 ! -o docker0 -j MASQUERADE
-A POSTROUTING -s 172.19.0.0/16 ! -o br-68428f03a4d1 -j MASQUERADE
-A POSTROUTING -s 172.18.0.0/16 ! -o docker_gwbridge -j MASQUERADE
-A POSTROUTING -s 172.19.0.2/32 -d 172.19.0.2/32 -p tcp -m tcp --dport 9200 -j MASQUERADE
-A DOCKER -i docker0 -j RETURN
-A DOCKER -i br-68428f03a4d1 -j RETURN
-A DOCKER -i docker_gwbridge -j RETURN
-A DOCKER ! -i br-68428f03a4d1 -p tcp -m tcp --dport 9200 -j DNAT --to-destination 172.19.0.2:9200
COMMIT
# Completed on Tue Aug 15 04:02:08 2017
# Generated by iptables-save v1.6.0 on Tue Aug 15 04:02:08 2017
*filter
:INPUT ACCEPT [174:13281]
:FORWARD DROP [0:0]
:OUTPUT ACCEPT [138:16113]
:DOCKER - [0:0]
:DOCKER-ISOLATION - [0:0]
:DOCKER-USER - [0:0]
-A FORWARD -j DOCKER-USER
-A FORWARD -j DOCKER-ISOLATION
-A FORWARD -o docker0 -m conntrack --ctstate RELATED,ESTABLISHED -j ACCEPT
-A FORWARD -o docker0 -j DOCKER
-A FORWARD -i docker0 ! -o docker0 -j ACCEPT
-A FORWARD -i docker0 -o docker0 -j ACCEPT
-A FORWARD -o br-68428f03a4d1 -m conntrack --ctstate RELATED,ESTABLISHED -j ACCEPT
-A FORWARD -o br-68428f03a4d1 -j DOCKER
-A FORWARD -i br-68428f03a4d1 ! -o br-68428f03a4d1 -j ACCEPT
-A FORWARD -i br-68428f03a4d1 -o br-68428f03a4d1 -j ACCEPT
-A FORWARD -o docker_gwbridge -m conntrack --ctstate RELATED,ESTABLISHED -j ACCEPT
-A FORWARD -o docker_gwbridge -j DOCKER
-A FORWARD -i docker_gwbridge ! -o docker_gwbridge -j ACCEPT
-A FORWARD -i docker_gwbridge -o docker_gwbridge -j DROP
-A DOCKER -d 172.19.0.2/32 ! -i br-68428f03a4d1 -o br-68428f03a4d1 -p tcp -m tcp --dport 9200 -j ACCEPT
-A DOCKER-ISOLATION -i br-68428f03a4d1 -o docker0 -j DROP
-A DOCKER-ISOLATION -i docker0 -o br-68428f03a4d1 -j DROP
-A DOCKER-ISOLATION -i docker_gwbridge -o docker0 -j DROP
-A DOCKER-ISOLATION -i docker0 -o docker_gwbridge -j DROP
-A DOCKER-ISOLATION -i docker_gwbridge -o br-68428f03a4d1 -j DROP
-A DOCKER-ISOLATION -i br-68428f03a4d1 -o docker_gwbridge -j DROP
-A DOCKER-ISOLATION -j RETURN
-A DOCKER-USER -j RETURN
COMMIT
The main points to note are that INPUT has been left alone by Docker and that there is (as documented) a DOCKER-USER chain that has been set up for us. All traffic headed to a container goes to the FORWARD chain and this lets DOCKER-USER filter that traffic before the Docker rules are applied.
A firewall that doesn’t smoosh Docker iptables rules
So a super simple firewall. Create a new /etc/iptables.conf that looks like this:
*filter
:INPUT ACCEPT [0:0]
:FORWARD DROP [0:0]
:OUTPUT ACCEPT [0:0]
:FILTERS - [0:0]
:DOCKER-USER - [0:0]

-F INPUT
-F DOCKER-USER
-F FILTERS

-A INPUT -i lo -j ACCEPT
-A INPUT -p icmp --icmp-type any -j ACCEPT
-A INPUT -j FILTERS

-A DOCKER-USER -i ens33 -j FILTERS

-A FILTERS -m state --state ESTABLISHED,RELATED -j ACCEPT
-A FILTERS -m state --state NEW -s 1.2.3.4/32 -j ACCEPT
-A FILTERS -m state --state NEW -m tcp -p tcp --dport 22 -j ACCEPT
-A FILTERS -m state --state NEW -m tcp -p tcp --dport 23 -j ACCEPT
-A FILTERS -m state --state NEW -m tcp -p tcp --dport 80 -j ACCEPT
-A FILTERS -m state --state NEW -m tcp -p tcp --dport 443 -j ACCEPT
-A FILTERS -j REJECT --reject-with icmp-host-prohibited

COMMIT
You can load it into the kernel with:
iptables-restore -n /etc/iptables.conf
That -n flag is crucial to avoid breaking Docker.
Whats going on here?
-
This firewall avoids touching areas Docker is likely to interfere with. You can restart Docker over and over again and it will not harm or hinder our rules in INPUT, DOCKER-USER or FILTERS.
-
We explicitly flush INPUT, DOCKER-USER and FILTERS. This means we don’t end up smooshing 2 different versions of our iptables.conf together. Normally this is done implicitly by iptables-restore. But its that implicit flush that that clobbers the rules that Docker manages. So we will only ever load this config with iptables-restore -n /etc/iptables.conf. The -n flag turns off the implicit global flush and only does our manual explicit flush. The Docker rules are preserved - no more restarting Docker when you change your firewall.
-
We have an explicit FILTERS chain. This is used by the INPUT chain. But Docker traffic actually goes via the FORWARD chain. And thats why ufw has always been problematic. This is where DOCKER-USER comes in. We just add a rule that passes any traffic from the external physical network interface to our FILTERS chain. This means that when I want to allow my home IP (in this example 1.2.3.4) access to every port I update the FILTERS chain once. I don’t have to add a rule in INPUT and a rule in DOCKER-USER. I don’t have to think about which part of the firewall a rule will or won’t work in. My FILTERS chain is the place to go.
Starting the firewall at boot
You can load this firewall at boot with systemd. Add a new unit - /etc/system/system/iptables.service:
[Unit]
Description=Restore iptables firewall rules
Before=network-pre.target

[Service]
Type=oneshot
ExecStart=/sbin/iptables-restore -n /etc/iptables.conf

[Install]
WantedBy=multi-user.target
And enable it:
$ sudo systemctl enable --now iptables
If your version of systemctl doesn’t support this you can do it the old way:
$ sudo systemctl enable iptables
$ sudo systemctl start iptables
The firewall is now active, and it didn’t smoosh your docker managed iptables rules. You can reboot and the firewall will come up as it is right now.
Updating the firewall
Pop open the firwall in your favourite text editor, add or remove a rule from the FILTERS section, then reload the firewall with:
$ sudo systemctl restart iptables
21 May 2017
I want systemd to start a service when a USB device is plugged in and stop it when i remove it.
Use systemctl to get a list of units:
$ systemctl
UNIT                                       LOAD   ACTIVE SUB       DESCRIPTION
sys-subsystem-net-devices-gamelink0.device loaded active plugged   PL25A1 Host-Host Bridge
<snip>
There’s no configuration required here - the .device unit just appears in response to udev events without any configuration. I’ve previously set up udev rules so that my USB host-to-host cable is consistently named gamelink0, but even without that it would show up under its default name.
The simplest way is just to take advantage of WantedBy. In gamelink.service:
$ cat /etc/systemd/systemd/gamelink.service
[Unit]
Description = Gamelink cable autoconf
After=sys-subsystem-net-devices-gamelink0.device
BindsTo=sys-subsystem-net-devices-gamelink0.device

[Service]
Type=simple
Environment=PYTHONUNBUFFERED=1
ExecStart=/usr/bin/python3 /home/john/gamelink.py

[Install]
WantedBy = sys-subsystem-net-devices-gamelink0.device
And then install it:
$ systemctl enable gamelink
Created symlink from /etc/systemd/system/sys-subsystem-net-devices-gamelink0.device.wants/gamelink.service to /etc/systemd/system/gamelink.service.
The WantedBy directive tells systemctl enable to drop the symlink in a .wants directory for the device. Whenever a new unit becomes active systemd will look in .wants to see what other related services needs to be started, and that applies to .device units just as much as .service units or .target units. That behaviour is all we need to start our daemon on hotplug.
The BindsTo directive lets us stop the service when the .device unit goes away (i.e. the device is unplugged). Used in conjunction with After we ensure that the service may never be in active state without a specific device unit also in active state.
26 Apr 2017
With a stateless Twisted app you can scale by adding more instances. Unless you are explicitly offloading to subprocesses you will often have spare cores on the same box as your existing instance. But to exploit them you end up running haproxy or faking a load balancer with iptables.
With the SO_REUSEPORT socket flag multiple processes can listen on the same port, but this isn’t available from twisted (yet). But with systemd and socket activation we can use it today.
As a proof of concept we’ll make a 4 core HTTP static web service. In a fresh Ubuntu 16.04 VM install python-twisted-web.
In /etc/systemd/system/web@.socket:
[Unit]
Description=Socket for worker %i

[Socket]
ListenStream = 8080
ReusePort = yes
Service = www@%i.service

[Install]
WantedBy = sockets.target
And in /etc/systemd/system/web@.service
[Unit]
Description=Worker %i
Requires=www@%i.socket

[Service]
Type=simple
ExecStart=/usr/bin/twistd --nodaemon --logfile=- --pidfile= web --port systemd:domain=INET:index:0 --path /tmp
NonBlocking=yes
User=nobody
Group=nobody
Restart=always
Then to get 4 cores:
$ systemctl enable --now www@0.socket
$ systemctl enable --now www@1.socket
$ systemctl enable --now www@2.socket
$ systemctl enable --now www@3.socket
Lets test it. In a python shell:
import urllib
import time

while True:
    urllib.urlopen('http://172.16.140.136:8080/').read()
    time.sleep(1)
And in another terminal you can tail the logs with journalctl:
$ sudo journalctl -f -u www@*.service
Apr 26 02:43:51 ubuntu twistd[10441]: 2017-04-26 02:43:51-0700 [-] - - - [26/Apr/2017:09:43:51 +0000] "GET / HTTP/1.0" 200 2081 "-" "Python-urllib/1.17"
Apr 26 02:43:52 ubuntu twistd[10441]: 2017-04-26 02:43:52-0700 [-] - - - [26/Apr/2017:09:43:52 +0000] "GET / HTTP/1.0" 200 2081 "-" "Python-urllib/1.17"
Apr 26 02:43:53 ubuntu twistd[10444]: 2017-04-26 02:43:53-0700 [-] - - - [26/Apr/2017:09:43:53 +0000] "GET / HTTP/1.0" 200 2081 "-" "Python-urllib/1.17"
Apr 26 02:43:54 ubuntu twistd[10452]: 2017-04-26 02:43:54-0700 [-] - - - [26/Apr/2017:09:43:54 +0000] "GET / HTTP/1.0" 200 2081 "-" "Python-urllib/1.17"
Apr 26 02:43:55 ubuntu twistd[10452]: 2017-04-26 02:43:55-0700 [-] - - - [26/Apr/2017:09:43:55 +0000] "GET / HTTP/1.0" 200 2081 "-" "Python-urllib/1.17"
Apr 26 02:43:56 ubuntu twistd[10447]: 2017-04-26 02:43:56-0700 [-] - - - [26/Apr/2017:09:43:56 +0000] "GET / HTTP/1.0" 200 2081 "-" "Python-urllib/1.17"
Apr 26 02:43:57 ubuntu twistd[10450]: 2017-04-26 02:43:57-0700 [-] - - - [26/Apr/2017:09:43:57 +0000] "GET / HTTP/1.0" 200 2081 "-" "Python-urllib/1.17"
As you can see the twisted[pid] changes as different cores handle requests.
If you deploy new code you can systemctl restart www@*.service to restart all cores.
systemctl enable will mean the 4 cores are available on next boot, too.